
Estimated Reading Time: 1 min
To turn off sleep mode on a Windows 10 PC, follow these steps:
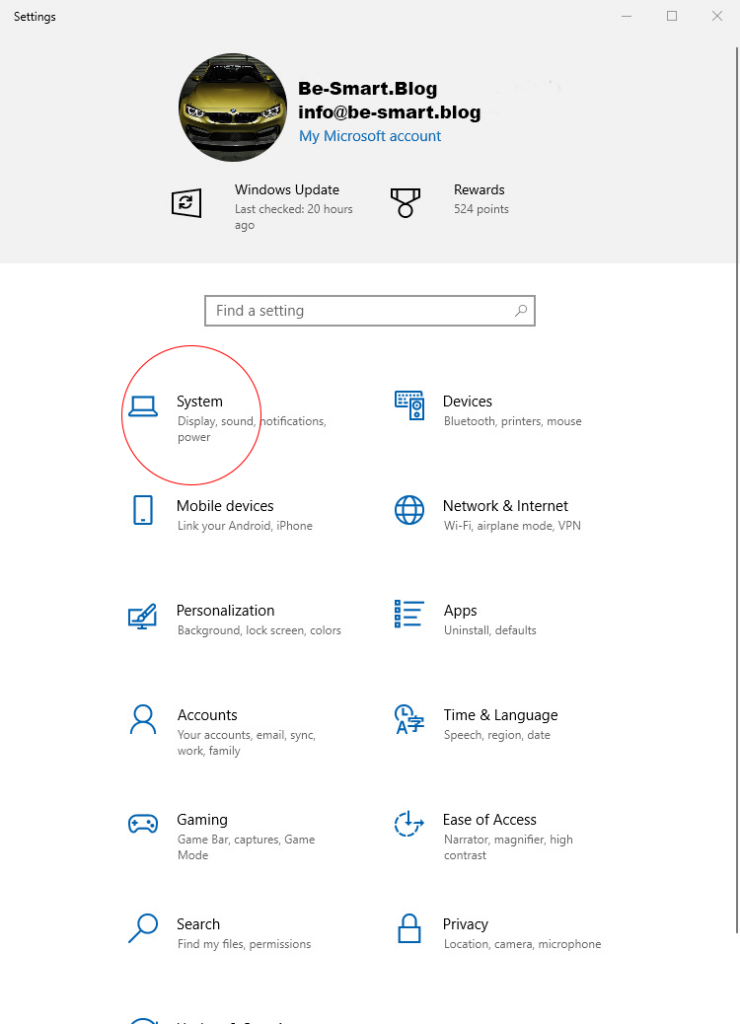
1. Open Settings
- Press
Win + Ito open the Settings window.
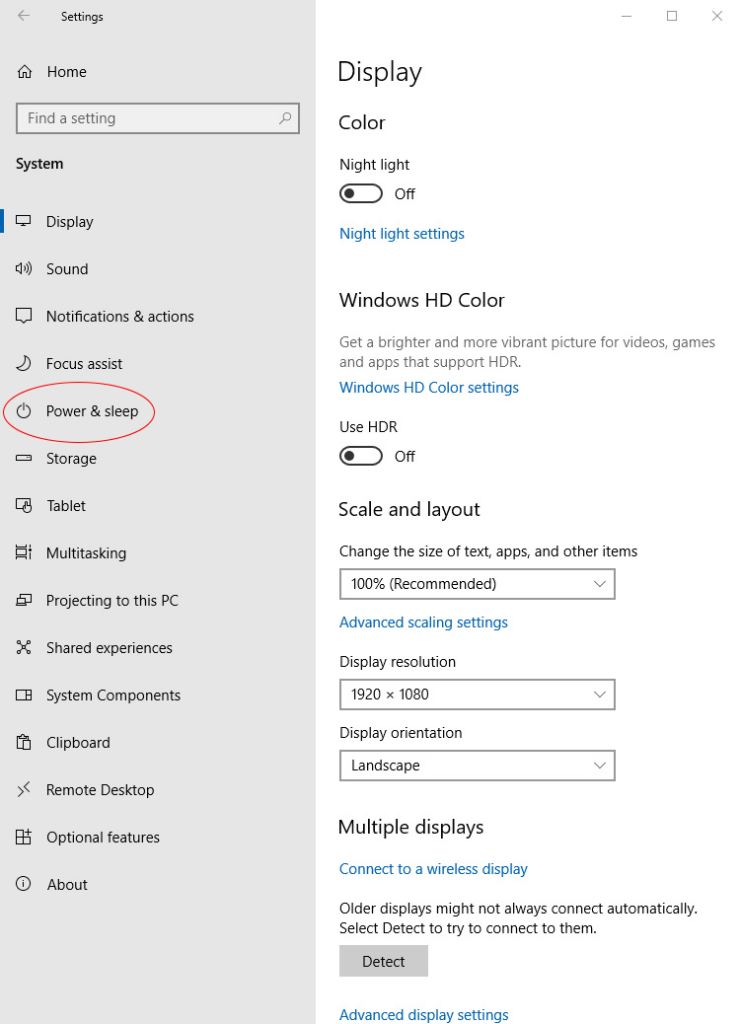
2. Navigate to Power & Sleep Settings
- In the Settings window, click on System.
- On the left-hand menu, select Power & sleep.
3. Adjust Sleep Settings
- Under the Sleep section, you’ll see two options:
- When plugged in, PC goes to sleep after.
- On battery power, PC goes to sleep after (for laptops).
- Use the drop-down menus to select Never for both options.
4. Optional: Adjust Advanced Power Settings
If you want more control over power settings:
- Open the Control Panel by searching for it in the Start menu.
- Go to Hardware and Sound > Power Options.
- Next to your selected power plan, click Change plan settings.
- Click Change advanced power settings.
- Expand the Sleep section and adjust any sleep-related settings as desired.
- Click OK to save changes.
Your computer will no longer enter sleep mode after these changes. If you’re configuring this to prevent interruptions during specific tasks, consider reverting to sleep mode afterward to conserve energy.